New Materials Provide Improved Esthetics
Clinica Dental Pineiro Sande Cambados - Pontevedra/Spain
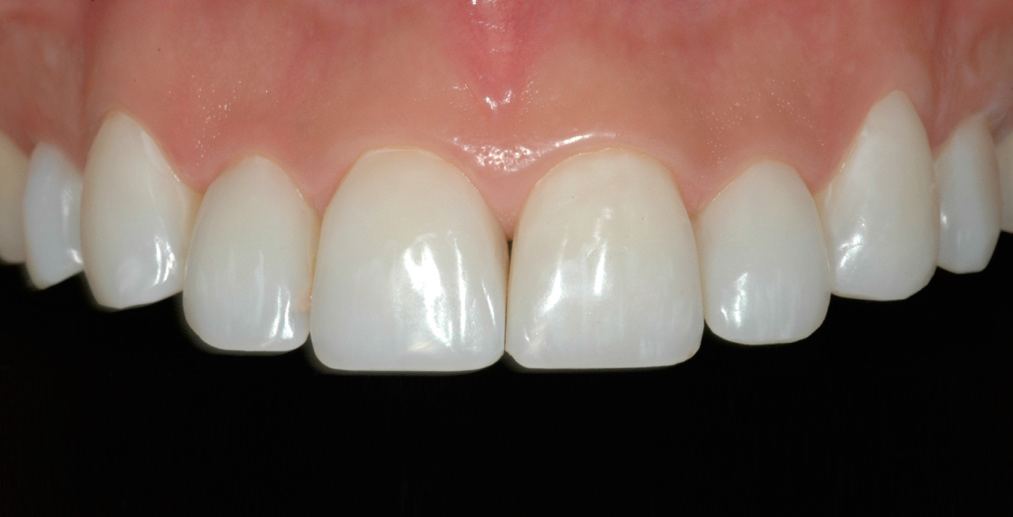
With the advent of new materials such as lithium disilicate, very thin veneers can now be fabricated. These ultra thin veneers require only minimal removal of natural tooth structure.
The all-ceramic system IPS e.max® covers all the current all-ceramic indications. It is suitable for use with CAD/CAM and press methods. The wide assortment of IPS e.max Press products comprises ingots in four levels of translucency (HT, LT, MO, HO) and Impulse ingots in three different “value” (Value 1, 2, 3) and two “opal” shades (Opal 1, 2). These materials are particularly useful for fabricating single tooth restorations if dental enamel has been damaged or stained, as described in detail in the following case study.
CLINICAL CASE
The 39-year-old patient consulted us about improving the appearance of her front teeth (Fig. 1). Apart from slight periodontal problems, we diagnosed proximal caries in the first incisors as well as Class III dental and skeletal malocclusion with an open bite (Fig. 2).
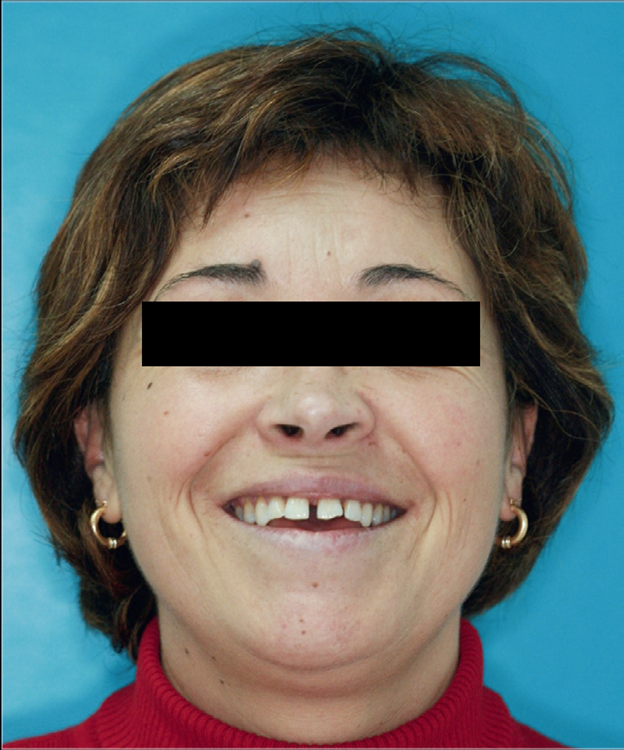
Fig 1: The patient wanted a more attractive smile.
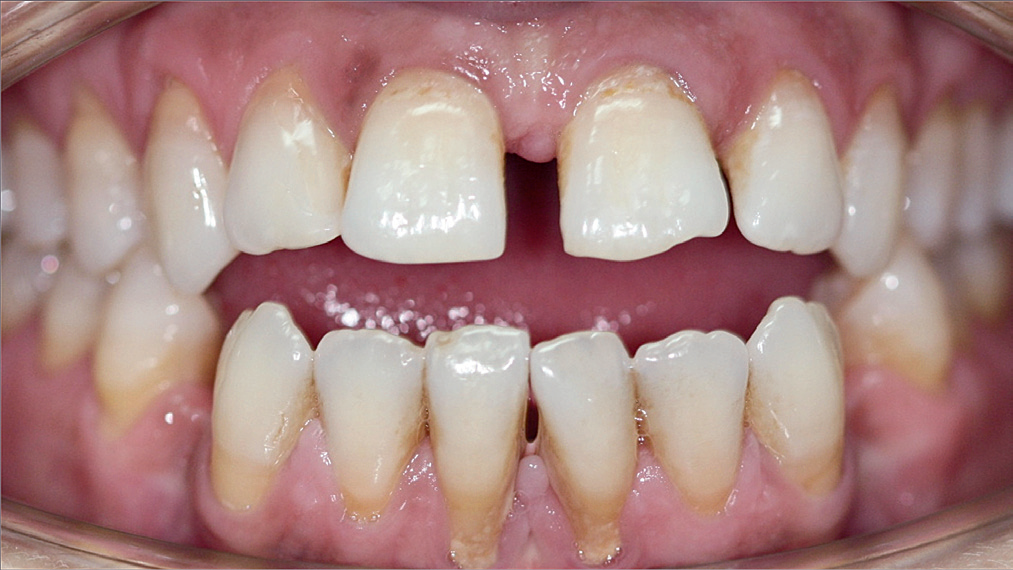
Fig 2: Close-up of the teeth before the treatment.
A radiographic examination confirmed the fundamental periodontal problem and also showed peri-apical infections surrounding teeth 31 and 32.
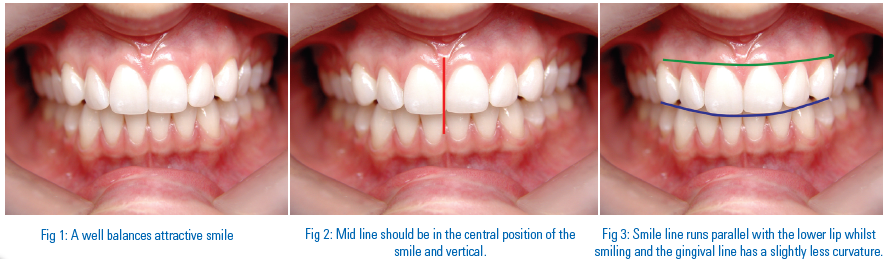
A two-stage treatment plan was devised. The first stage involved the elimination of caries and infection. It included periodontal curettage and planing of root surfacesin order to control the underlying disease. The malocclusion was corrected with orthodontic treatment. The second stage focused on esthetics. This phase started with a clinical, radiological and photographic analysis (Figs 3 and 4). Fur
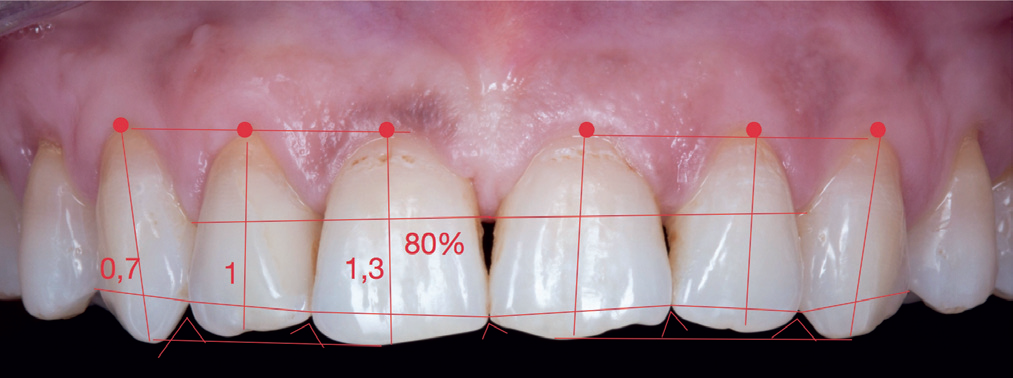
Fig 3: Tooth analysis after the first treatment phase.
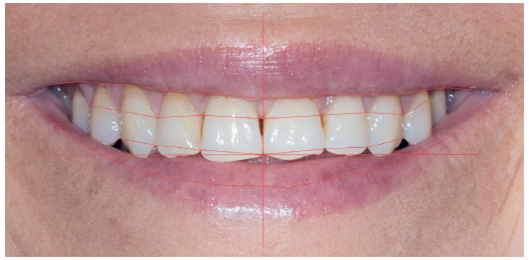
Fig 4: Smile analysis.
thermore, an impression was taken and the maxillomandibular relationship was recorded by means of an arbitrary facebow. In addition, the gum line was adjusted with the help of connective tissue transplants and the lower tooth arch was bleached. Finally, the ultra-thin veneers (< 0.5 mm) made of IPS e.max Press Impulse Opal 2 were placed.
After the teeth had been thoroughly analyzed, a wax-up was fabricated, which was subsequently used to create a mock-up. A 2-mm-thick perforated tray (Fig. 5) and two silicone matrices were produced. The first silicone matrix was used to check the vertical dimension of occlusion during preparation (Fig. 6), while the second one was used to fabricate the chairside temporary.

Fig 5: Three-dimensional assessment of the preparation with a perforatedtray.
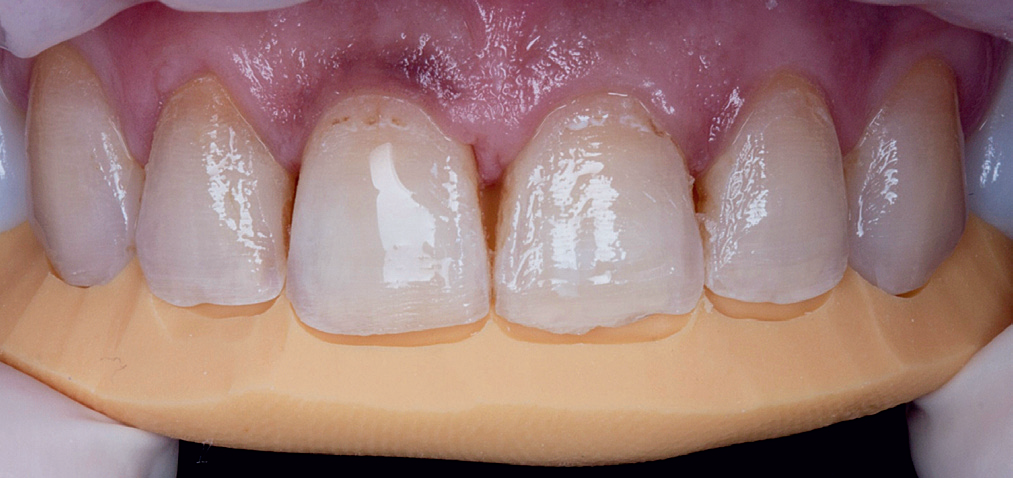
Fig 6: Silicone matrix for checking the vertical dimension of occlusion ofthe preparation.
PREPARATION
In order to ensure proper reduction of the vestibular tooth surface, a depth marker was used. This bur cut orientation grooves with a depth of 0.3 mm. The incisal edge was reduced with a diamond bur (0.6 mm). This instrument was also used to remove the ridges between the grooves and completely level out the surface. The proximal and gingival areas were prepared with the same diamond.
A retraction cord was placed along the gingival margin to protect the gum tissue during the preparation procedure. The marginal and proximal areas were prepared and then polished. The entire preparation surface was completely smoothed with a polishing disc and a medium-grit polishing paste: all grooves and edges were eliminated. The silicone matrix was inserted to check the correct
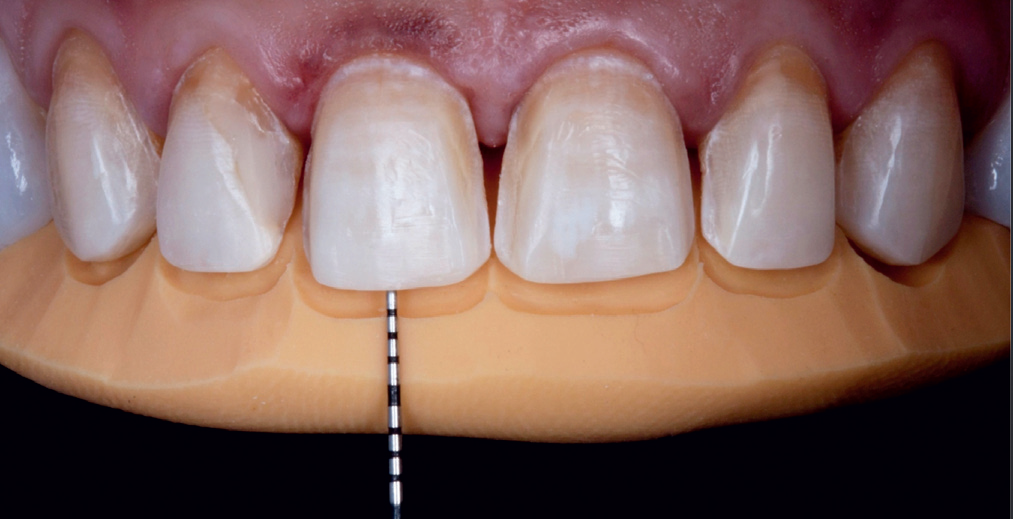
Fig 7: Inspection of the incisal reduction.
dimensions of the prepared teeth (Fig. 7). Then, the retraction cords were removed.
IMPRESSION
The heavy/light dual-phase impression was taken with a customized tray, which was coated with an adhesive to increase the adhesion of the impression material on the tray. The double-cord retraction technique was used: The first retraction cord (size 000) was individually packed in the sulcus of each prepared tooth. A second continuous retraction cord (size 00) was placed on top. With this method the gingiva is completely displaced from the prepared dental hard tissue and blood and saliva, which could adversely affect the precision of the impression, are absorbed. The heavy/light
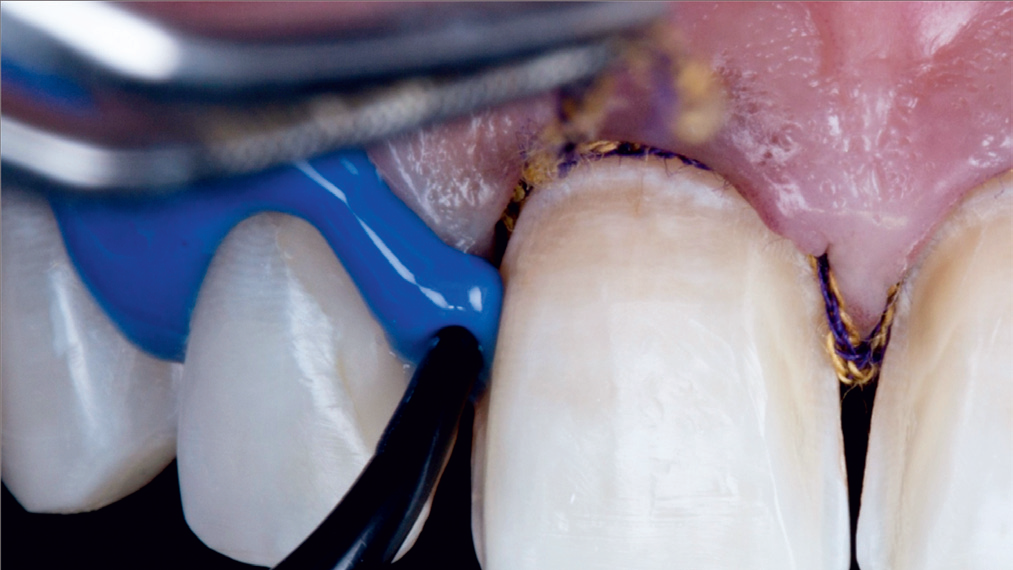
Fig 8: The light-body impression material is syringed in the sulcus.
dual-phase impression technique employs impression materials of different viscosities. Accordingly, a heavy-body material was loaded into the tray, while a light-body material was syringed around the prepared teeth (Fig. 8).
The precision of the impression was checked and then temporary restorations were produced chairside. For this purpose, a two- component composite resin was mixed and syringed into the previously fabricated silicone matrix. Once the composite resin demonstrated an ideal consistency, the matrix was placed in the patient’s mouth. The provisional material was cured and then the matrix was removed. Excess composite was trimmed away with rotary instruments. Subsequently, the temporary restorations were characterized with staining and glazing materials.

LABORATORY WORK
The dental lab technician made a cast from the disinfected impression using class IV plaster. After the models had hardened, the preparation margins were defined (Fig. 9). The veneers were waxed up and then removed from the die and invested. Subsequently, they were reproduced with IPS e.max using the press technique. The veneers were divested (Fig. 10), finished and individually characterized (Fig. 11).
TRY-IN AND CEMENTATION
In the second clinical phase, the veneers were tried-in and cemented in place. Firstly, the temporary restorations were removed and the prepared teeth were cleaned. Each veneer was tried-in individually to ensure correct fit. Next, the prox-imal fit was checked

by positioning one veneer correctly andthen placing the adjacent veneer. The position of the first veneer was examined very closely after the adjacent veneer had been placed in order to establish any changes.
The veneers were placed with Variolink® Veneer. In the firststep, the shade of the adhesive was selected. Variolink Try-Inpastes were

Fig 12: The veneers are tried in with Variolink Try-In.
silane cou-pling agent Monobond Plus for 60 seconds. Any excess was dispersed with a strong stream of air. The prepared teeth now had to be cleaned with brushes and fluoride-free pro-phy pastes. The enamel was etched with the 37-percent orthophosphoric acid Total Etch for 30 seconds and then cleaned with a water jet and oil-free, uncontaminated air.The adhesive ExciTE® F was applied shortly before the veneers were placed. The adhesive was applied thickly on enamel and dentin and carefully scrubbed in for at least10 seconds. Excess was dispersed to a thin layer with aweak stream of air. Pooling had to be avoided in the process. A shiny surface showed that the tooth was com-pletely sealed. The adhesive was cured for 10 seconds with alight intensity of above 500 mW/cm2. Next, the luting cement Variolink Veneer was directly applied to the preparation.
In the final luting phase, the veneers were placed on the pre- pared teeth with the application of consistent pressure and then polymerized for two seconds (Fig. 13). At this stage,the luting material was not yet completely cured. As a result, it was easy to
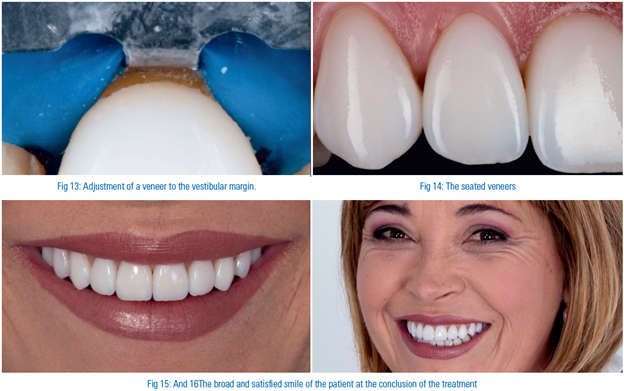
excess with a probe. Subsequently, the restorations were cured for 90 seconds from all sides.The margins were previously isolated with the glycerine gelLiquid Strip. This measure prevents the formation of anoxygen-inhibited layer during polymerization and enablesthe luting material to cure properly. Any excess was removed with the help of a scalpel. Fine-grit burs and silicone polishers were used at the palatal margin. The cementation processwas finalized with the removal of the rubber dam and aninspection of the occlusion(Fig. 14).
After the treatment had ended, the patient received instructions on how to look after her restorations. She was scheduled for a recall examination after one month (Figs 15and 16).
CONCLUSION
The topic of “esthetics” continues to grow in importance indentistry. The development of innovative materials, such as IPS e.max Press Impulse, allows new techniques to be used, which enable non- invasive preparation of the teeth. Further-more, these techniques provide esthetic benefits that elimi-nate the previous quality difference between the “press-on”and the layering technique.
Specialist knowledge of the adhesive cementation of lithium disilicate restorations gives dentists the professional edgeneeded to face the challenges associated with this type of treatment. The treatment protocol is firmly established today. Moreover, it is of utmost importance for dentists and dental technicians to do their work with great precision. In order tojointly have a positive impact on the results, both parties must know the entire procedure. Teamwork and a meticu-lous approach during the individual treatment phases are required to achieve esthetic outcomes.
ACKNOWLEDGEMENT
Would like to the thank Roberto Portas Moure for the execellent dental lab work and the patients for her confidence in us andher pateince during the treatement.
Disclaimer from Guident
The views and opinions expressed in articles published in Guident are solely those of the authors and do not necessarily reflect the views of the editors, the editorial board or the publisher, Ivory India. Guident does not endorse any product, technique or treatment described. Clinical content is intended for qualified dental and medical professionals and is not a substitute for individual clinical judgement. Guident, its editors and the publisher accept no liability for any consequence arising from the use of information published in the journal.
How to cite this article
Dr. Rafael Pineiro Sande. New Materials Provide Improved Esthetics. Guident. 2013 Jul;6(9). Available from: https://guident.in/articles/aesthetic-dentistry/new-materials-provide-improved-esthetics.html