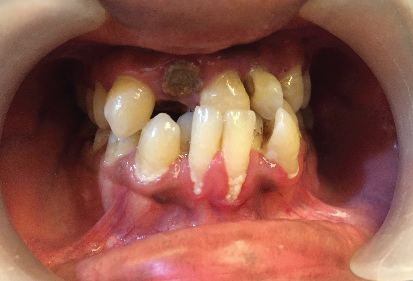
SS Indirect Bonding Technique
Maharaja Ganga Singh, Sri Ganganagar, India
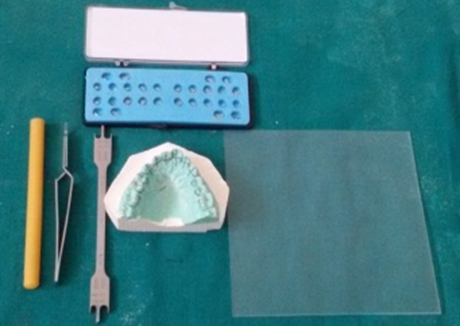
Fig 1.Armentrarium.
PROCEDURE FOR INDIRECT BONDING TRAY
1.An accurate alginate impression is made and working cast in orthodontic stone are poured. Care should be taken to ensure that impression material do not get distorted. The working cast should be prepared with careful trimming, removal of bubbles, and filling of small voids. If there are large bubbles or voids, impression should be repeated.
2.The long axis of each tooth on the center of its crown is determined and then bracket positioning guidelines are made on the cast with a pencil. Now the bracket slot height is marked on the cast which is perpendicular to the long axis of the tooth.
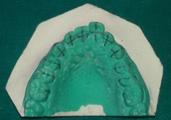
Fig 2. Guide lines for bracket placement.
3. The pre-oriented brackets are removed directly from the sealed pack and positioned on the individual teeth with the help of sticky wax. We have used sticky wax because it can be easily removed from bracket base with the help of probe without damaging the bracket base surface and the excess material around the bracket after the placement on the cast is also removed with the help of probe, and the position of the bracket is carefully checked with a bracket gauge. Once all brackets have been placed, a final check of the bracket positioning is done and the excess sticky wax is again removed.

Fig 3. Bracket positioned on the cast.
4. Now an indirect bonding tray is made with a bio-star sheet which is 1mm thick. We have used a Biostar unit to vacuform a 1-mm-thick layer of Biostar sheet.
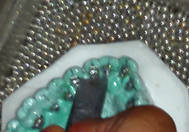
Fig 4. Bio-star try fabrication and Indentation made (vertical&horizontal) on brackets
5.The Bioplast layer is vacuformed onto the cast first, and with the help of wet cotton it is adapted firmly. A knife edge shap instrument is heated with the help of blow torch and indentations are made on bracket slot (vertical and horizontal ) to prevent bracket dislodgement and to enhance additional stability of brackets.
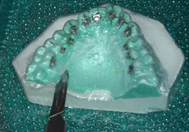
Fig 5. Tray cut with scalpel
6.The bio-star sheet is taken out and the excess material is trimmed off from all heights of contour for patient comfort and closer fit, with a scalpel.
7.The bonding trays are now removed from the casts along with the brackets.
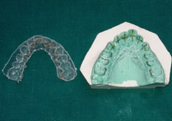
Fig 6. Tray with lingual brackets
8. A window is made on the incisal edge of the tray so that any excessive composite flows out through this window and doesn’t flow on the gingival area which may block the tie wing area of the bracket. Window also helps in curing of the composite faster and helps in better bond strength
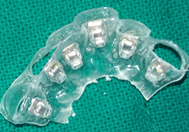
Fig 7. Sectioned tray with window
CLINICAL PROCEDURE
Preparing the patient
1. Patient is seated on dental chair and a napkin placed around his neck. An anti-sialagogue, such as Sal-Tropine is indicated.
2.Bonding trays are shown to the patient and the procedure is explained from taking the impressions to placing the brackets in proper position and forming the tray.
The tray is then sectioned into 3 segments.
Trays may be sectioned as follows:
. Teeth 13 to 23 or 33 to 43 (anterior segment)
. Teeth 14 to 17 or 24 to 27; 34 to 37 or 44 to 47 (posterior segment)
3.If any material is remaining on the base of the bracket, it should be removed before seating the tray.
4. Teeth that are to be bonded, are isolated using the dry air. If necessary, plastic cheek retractors, Tongue away, cotton rolls may be used.
5.Etchant is applied onto the teeth for 15 seconds. The etching solution should not contact gingiva. It is then rinsed with a steady Stream of water and air dried for another 15 seconds and excess water is suctioned so that saliva doesn’t not come in contact with etched enamel. Cotton rolls are replaced again.
6. A coat of primer is painted onto the enamel Surface and Light cure for 20 second on each tooth.
7. Flowable composite is applied on the base of bracket and the tray is positioned over the teeth. Equal pressure is applied to the occlusal, labial, and buccal surfaces, with fingers and is holded firmly to stabilize the brackets in position. Excess composite flows out through the window created on the occlusal and incisal surface of the tray and is cleaned with the help of probe.
8.Composite is now cured with light curing unit, 20 second on each tooth.
The tray is carefully removed taking care not to dislodge bracket. Extreme Care is taken when removing the tray from around Bracket wings.
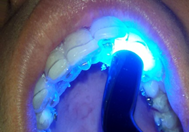
Fig 8. Light curing in patient mouth
9.Scale the excess composite around the brackets.
10. Repeat steps for the remaining trays. The initial archwire is then inserted.

Fig 9. Arch wire inserted
CONCLUSION
Studies have been conducted on use of bio-star as a method of indirect bonding where composite is used as a medium of attachment of the bracket to the tooth surface on the cast 1,2due to which the bond strength of the composite is compromised when it is again applied on the bracket for bonding purpose on the tooth. More over while removing composite from bracket base there are chances of bracket dislodgement from the newly formed tray which may affect the accurate positioning of the bracket and this may also hamper the mesh work of bracket base. To over come this problem we have used sticky wax as a medium of attachment because it can be easily removed from the bracket base with the help of probe or explorer and bond strength of composite is also maintained and brackets do not get dislodged from the newly formed bio star tray while removing wax. We have also compared the bond strength1,2,3after curing of composite which was more in our method because we have created a window on the incisal and occlusal area from where we have cured the composite where as it was less if we cured it directly from over the tray i.e. without creating a window. Bond strength plays a very important role in indirect bonding specially in lingual orthodontics because if the bracket gets dislodged the whole procedure has to be repeated. A new method for effective and efficient indirect bonding of labial and lingual orthodontic brackets has been presented.
ADVANTAGES OF INDIRECT BONDING
- Bracket placement is accurate
- Use of the orthodontist's time is reduced.
- The use of separators is eliminated.
- It is a very cheap method.
- less time consuming in lab as well.
- Bond strength of composite is more.
DISADVANTAGES OF INDIRECT BONDING
- Indirect bonding is technique sensitive.
- Additional set of impressions is needed.
REFERENCES
- Anoop Sondhi, Bonding in the new millennium:Reliable and consistent bracket placement with indirect bonding DDS, MS' World J Orthod 2001;2:106-114.
- Lincoln Issamu Nojima1, Adriele Silveira Araújo2, Matheus Alves Júnior3 Indirect orthodontic bonding - a modified technique for improved efficiency and precision: Dental Press J Orthod. 2015 May-June;20(3):109-17
- B. Wendl, H. Droschl, P. MuchitschIndirect bonding—a new transfer method European journal of orthodontics
- Guenthner TA, Larson BE. Indirect bonding: a technique for precision and efficiency. Semin Orthod. 2007;13(1):58-63.
- Aguirre MJ,King GJ,Waldron JM, Assessment of bracket placement and bond strength when comparing direct bonding to indirect bonding technique. American Journal of Orthodontics 1982;82:269-276
Disclaimer from Guident
The views and opinions expressed in articles published in Guident are solely those of the authors and do not necessarily reflect the views of the editors, the editorial board or the publisher, Ivory India. Guident does not endorse any product, technique or treatment described. Clinical content is intended for qualified dental and medical professionals and is not a substitute for individual clinical judgement. Guident, its editors and the publisher accept no liability for any consequence arising from the use of information published in the journal.
How to cite this article
Dr. Amit Sidana Dr. Parul Agrawal Department of Orthodontics. SS Indirect Bonding Technique. Guident. 2016 Jul;9(8). Available from: https://guident.in/articles/orthodontics/ss-indirect-bonding-technique.html