Basic Steps in Rubberdam Application
Director, Upskill Dental Academy Mumbai, India
Rubber dam application requires a careful study of the clinical situation and planning prior to application of the same.
Identify which teeth to include in the operating field for the following isolations:
- Posterior Isolation
- Anterior Isolation
- Single Tooth Isolation
- Pediatric dentistry Isolation
OPERATING FIELD
The area (teeth) to be isolated to get better visibility and access. This article is dedicated to single tooth isolation ,its indications and technique of application.
INDICATIONS
Single tooth isolation is ideal for root canal treatment procedures
Class 1 cavity restorations
Pit and fissure sealant applications
STEP BY STEP TECHNIQUE
- Ask the patient for any history of allergy
- Evaluate the clinical situation in the oral cavity
- Mouth opening (whether restricted)
- Difficulty in breathing (DNS, Naso Pharyngeal afflictions)
- Gag reflex
- Condition of the tooth to be isolated
- All four walls are present
- Badly broken down tooth
- Tilted (mesially ,distally)
- Rotated
- Adjacent tooth tilted towards the tooth to be clamped
- Dimensions (average ,large ,small –buccolingually and mesiodistally)
- Partially erupted tooth (difficult isolation
SELECTING THE APPROPRIATE CLAMP
Anterior Tooth: Use a double-bowed clamp (i.e. #9),brinkers tissue retractors
Premolar: Use a small, flat-jawed clamp, (i.e. #00, #2) or curved-jawed clamp (#1) for maxillary premolar.
Mandibular Molar: Use a flat-jawed clamp, (i.e. #3, #7).
Maxillary Molar: Use a clamp with curved jaws (i.e. #8, #56, #4).
Partially-Erupted Tooth: Use a clamp with subgingivally designed jaws, suitable to the size of anchor tooth (i.e. #2A, #8A, #14, #14A).
Structurally Compromised Tooth: Use a clamp with serrated jaws (i.e. #12A, #13A).
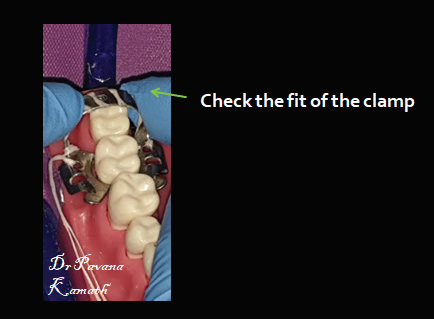
Secure the clamp chosen with dental floss and try the clamp over the tooth
Check for
adaptation of jaws around the tooth(the jaws should not extend beyond the mesial and distal line angles of the tooth).
Select a clamp that will maintain four-point contact with the tooth’s proximal surfaces. If a clamp is too large, it will impinge on the soft tissues. If it is too small, it will not properly grasp the tooth’s surface, and will be unstable.
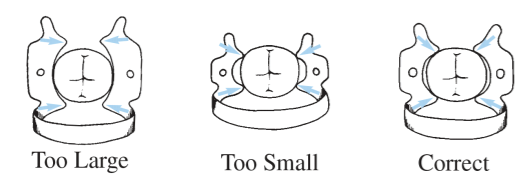
Pic courtesy https://www.coltene.com/fileadmin/Data/EN/Products/Treatment_Auxiliaries/Dental_Dam/Dam_It__It_s_Easy__FINAL.pdf
Prepare the patient
Inform the patient about rubberdam application ,to ensure they are comfortably seated for an hour during the dental procedure.
Floss the contacts with a floss dipped in water soluble lubricant (velvechol)
Anaesthesia to the marginal gingiva. The rubber dam sheet is initially marked to identify its positioning in the mouth,preferably a punch on the upper right corner

The rubberdam sheet is placed on the template and the tooth required to be isolated is marked .
THE WINGED CLAMP TECHNIQUE
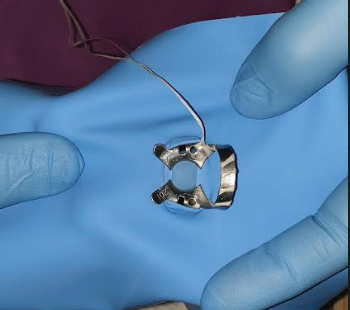
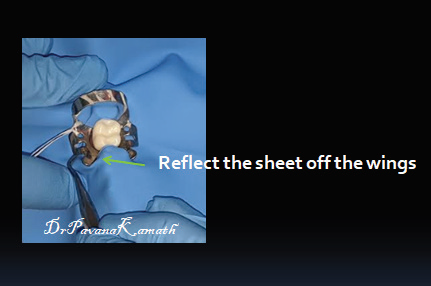
The winged clamp with floss secured is mounted on the sheet .the wings of the primary arm are mounted on the sheet . the dam, clamp, and frame are simultaneously carried to the patient’s mouth for placement. Once the clamp is placed first lingually followed by buccally over the tooth ,the rubberdam sheet is reflected off the wings of the clamp.the rubber dam napkin is placed accurately. The loose end of the floss used to secure the clamp is tucked under the frame .the isolation is now complete.
Advantage-the clamp the sheet and the frame are applied altogether hence it saves a lot of time.
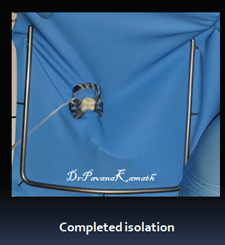
THE WINGLESS CLAMP TECHNIQUE
The clamp is placed on the tooth first, and the dam is stretched over the clamp and tooth. Tie a safety ligation to the clamp to prevent swallowing should the clamp become dislodged. Now place a safety ligation on a wingless clamp. This technique is very useful in limited mouth opening.
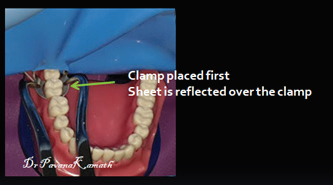
MODIFIED WINGED TECHNIQUE
The dam is stretched over the bow of the clamp prior to its placement in the mouth. The clamp is seated and the dam is stretched over the jaws and tooth.

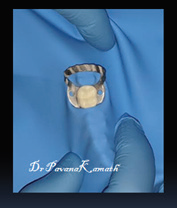
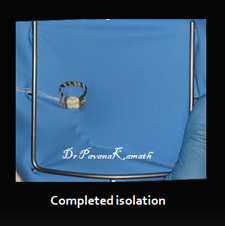
After completion of isolation the seal around the margins of the tooth need to be verified ,if required liquid dam can be used to seal the cervical margin.
REFERENCES
Disclaimer from Guident
The views and opinions expressed in articles published in Guident are solely those of the authors and do not necessarily reflect the views of the editors, the editorial board or the publisher, Ivory India. Guident does not endorse any product, technique or treatment described. Clinical content is intended for qualified dental and medical professionals and is not a substitute for individual clinical judgement. Guident, its editors and the publisher accept no liability for any consequence arising from the use of information published in the journal.
How to cite this article
Dr. Pavana Kamath. Basic Steps in Rubberdam Application. Guident. 2019 Oct;12(11). Available from: https://guident.in/articles/endodontics/basic-steps-in-rubberdam-application.html