
Shade Selection and Shade Communication: Part-2
MIK Dental, Mumbai, India
This article is a direct extract from the book by Dr. Moez Khakiani, titled Clinical Fixed Prosthodontics- Master Volume. It is a color atlas suited for clinicians who wish to expand their horizons in advanced prosthodontics. It has over 400, pages, and over 2500 color illustrations distributed over 25 chapters. It is a MUST-HAVE guide for clinical prosthodontics, including chapters like master level occlusion, full mouth rehabilitation, porcelain veneers, table top prostheses, implant dentistry, digital dentistry, etc.
Why don’t you give this book a try?
It is available for preview and purchase on www.mikdental.in, or you could connect on +91 9833400664 for the same.
D. VITA Linearguide 3D-MASTER
To overcome the drawback associated with the use of the VITA Toothguide 3D-MASTER, VITA in the year 2008 launched a new shade guide system, called the Linearguide 3D-Master.
This system is based on the same concept of selecting Value first. However, the Chroma and Hue have been clubbed together and thus, the shade selection process is completed in just two steps (unlike the toothguide which required three steps). In addition, this guide consists of primary and intermediate shade tabs to help improve the accuracy of shade selection.
Design
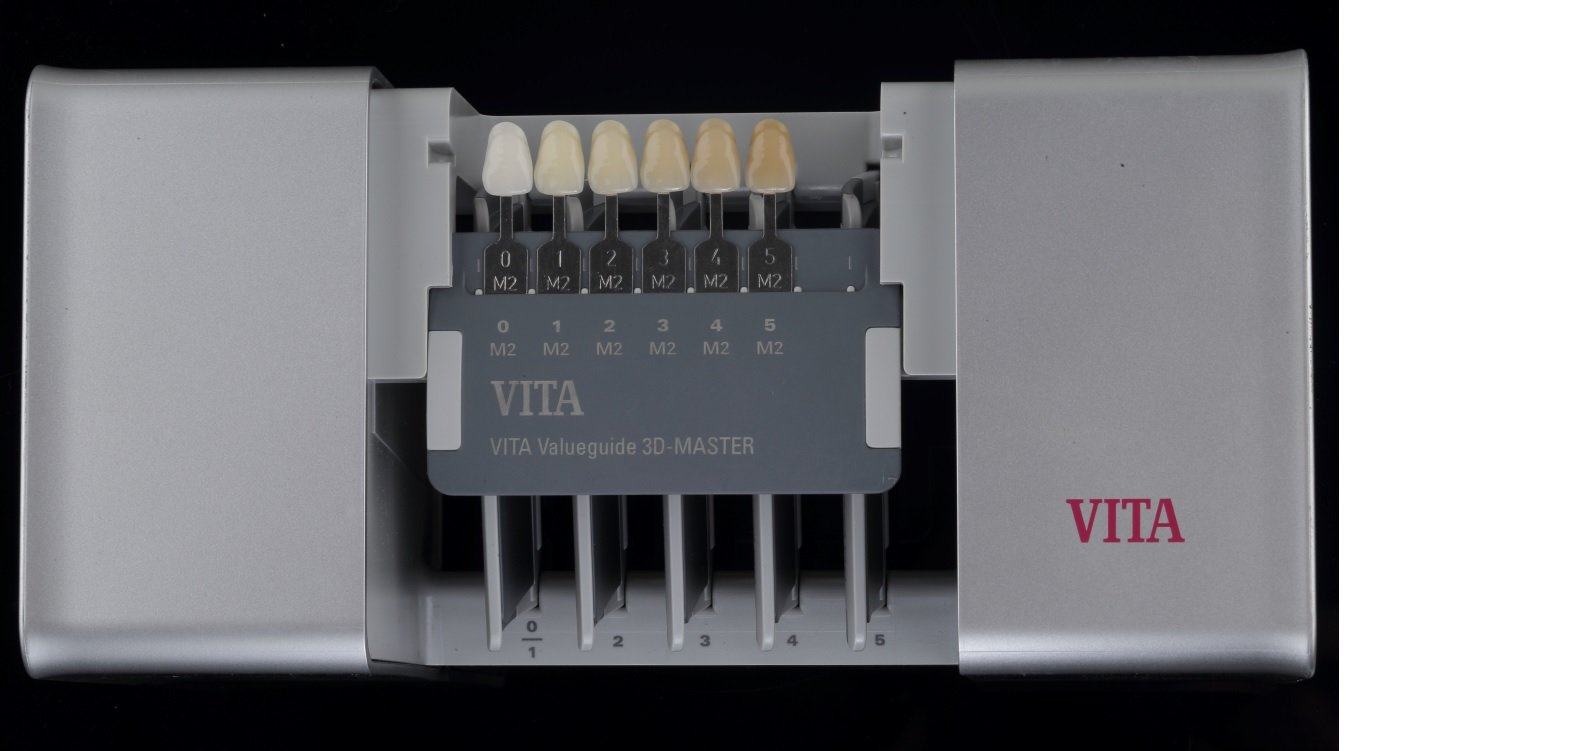

Fig. 3.22, 3.23: The opened box of a VITA Linearguide 3D-MASTER has 6 guides (1 for Value and 5 for Chroma/Hue). The dark grey guide (yellow arrow) is the ‘Valueguide’ and has 6 tabs numbered 0-5, with 0 (brightest) arranged to the extreme left and 5 (dullest) placed on the extreme right. The 5 light grey guides are the ‘Chroma/Hueguide’ and correspond to the 6 value groups (0 and 1 are clubbed into one guide).
Protocol for use

Fig. 3.24: STEP 1: The Value is determined first using the ‘Valueguide’. Here again, it is advisable to hold the guide at an arm’s distance from the patient and to squint the eyes. It helps to follow the elimination process and narrow down to one Value for the reference tooth. The number 2 group was chosen for this patient.

Fig. 3.25: STEP 2: Once the Value is finalized, the Chroma and the Hue are selected using the corresponding ‘Chroma/Hueguide’. The selection process is thus simplified, as the number of tabs to choose from decreases very quickly throughout the procedure.

Fig. 3.26: The final shade chosen for this patient was 2R2.5. An image of the shade tab along with a grey card (explained later in the chapter) should be sent to the laboratory.
E. Natural Die Material Shade Guide
When using LiDiSi or translucent zirconia (for a crown or a PLV), communicating the shade of the prepared dentin is of paramount importance, especially if the underlying tooth is discolored.

Fig. 3.27: IPS Natural Die Material Shade Guide from Ivoclar Vivadent
The Natural Die Material shade guide from Ivoclar Vivadent has 9 shade tabs to help communicate the stump shade with the laboratory. The company provides die stone in each specific shade (hence the name of the guide). Such a provision allows the technician to gauge the optical properties of the final restoration, as influenced by the
underlying tooth shade.
Unlike other shade guides, the dentin shade guide is to be used after the tooth has been prepared. This is because, certain discolorations darken as the tooth is prepared deeper into dentin, while others show a decrease in chromacity.

Fig. 3.28: Natural die material shade guide being used to record the stump shade Image courtesy: Dr. Irfan Kachwala, Mumbai; India
GENERAL PRINCIPLES FOR SHADE SELECTION
Innumerable variables can influence the shade selection process.Thus, standardization of certain aspects can help eliminate or reduce the possibility of errors. It is prudent to select the shade at the start of the appointment. This is because:
- Through the duration of treatment, teeth tend to dehydrate as the mouth is kept open. This alters the value and chroma of the tooth. Desiccated teeth often take more than 24 hours to regain their normal coloration.
- Through the duration of treatment, the eyes tend to fatigue, thereby compromising the clinicians ability for correct shade selection. The dental chair light can cause glare, adding to the fatigue.
This is exactly the reason why, the shade selection chapter has been sequenced before the chapter on tooth preparation.
STANDARDIZATIONS PRIOR TO SHADE SELECTION
- The chair light should be turned off or pointed in another direction.
- Patient should be draped with a neutral colored bib (grey).
- Teeth must be cleaned, as the presence of plaque or stains can mask the true shade of the tooth.
- Shade selection should ideally be done in natural day light. If this is not possible, color corrected light must be used which have a temperature of 5000-6000° K.
- It benefits to have a chair-side associate who can help confirm the shade (especially helpful for clinicians who may suffer from color blindness).
- Lipstick, eye wear or other makeup should be removed, because any color (which is not neutral) has the potential to cause chromatic adaptation, leading to an error in shade selection, as shown in Fig. 3.29 on the right.

STANDARDIZATIONS DURING SHADE SELECTION
Shade tab related standardizations
- Incisal edges of the shade tab(s) should be oriented against the incisal edge of the tooth; closest to it but without touching it. This avoids reflections against each other.
- When choosing the Value, tooth and shade tabs must be completely dry. They can be made moist when selecting hue and chroma, as surface texture can influence the final shade.
- Incisal edge of the tab should be oriented along the long axis of tooth and in the same plane as the reference tooth. If kept behind, it will appear darker and in case the tab is kept in front of the tooth, it will appear lighter, as seen in Fig. 3.30 on the right.

Fig 3.30
Dentist related standardizations
- Shade selection should be done quickly, without looking at the tab(s) for more than 5-7 seconds. Staring at a shade can result in cone fatigue, which could result in incorrect shade perception. In case of doubt, it helps to trust your initial decision, as the eyes tire very quickly.
- In order to avoid chromatic adaptation, it is advisable to rest the eyes between shade comparisons. This can be achieved by looking at a blue or a grey surface. Focusing on a blue surface for one minute re-sensitizes the eye, thereby improving its perception to yellow color (yellow and blue are complimentary colors). On the other hand, grey is a neutral color and is thus, restful to the retinal cones. This is the reason why most shade guide systems are designed with a grey or blue body.
- Shade selection should always be done with teeth at the eye level. This allows for the most sensitive part of retina to be used.
- The Value should be selected with squinted eyes. This decreases the amount of light that enters the eyes, thereby sensitizing the retinal rods to differentiate the degree of lightness or darkness.
- When choosing the Chroma, it helps to compare the mid-buccal portion of the shade tab with the mid-buccal portion of the tooth.
- When selecting the Hue, it helps to use the canine as the reference tooth.
DRAWBACKS ASSOCIATED WITH SHADE TABS
- Shade tabs are made without a metal backing. This is a drawback when selecting the shade for a PFM restoration.
- Shade tabs are much thicker than the estimated porcelain thickness in any prostheses.
- Different badges of porcelain (of the same composition and shade) may have subtle variations in optical properties.
- Porcelain from different manufacturers show evident variations for the same base shade.
- The neck area of shade tabs have the highest chroma and can influence judgement. As this area of the tab has little clinical use, it could be trimmed off to avoid bias, as shown in Fig. 3.31 below.

Fig 3.31
- The mesio-distal width of shade tabs makes it impossible to place two tabs within the width of a natural tooth. This makes comparison difficult, as shown in Fig. 3.32 below.

Fig 3.32
INSTRUMENTAL TECHNIQUE
Regardless of the shade guide and/or technique used, visual determination of the shade is subjective and thus, lacks reliability and consistency. Visual color assessment is plagued with inconsistencies that can result from uncontrolled factors such as the observer’s physiologic/psychologic state, fatigue, aging, emotions, previous eye exposure, lighting conditions, object and illuminant position, etc.
The instrumental technique for shade selection was introduced to overcome the subjective variations associated with the visual protocol of shade selection.
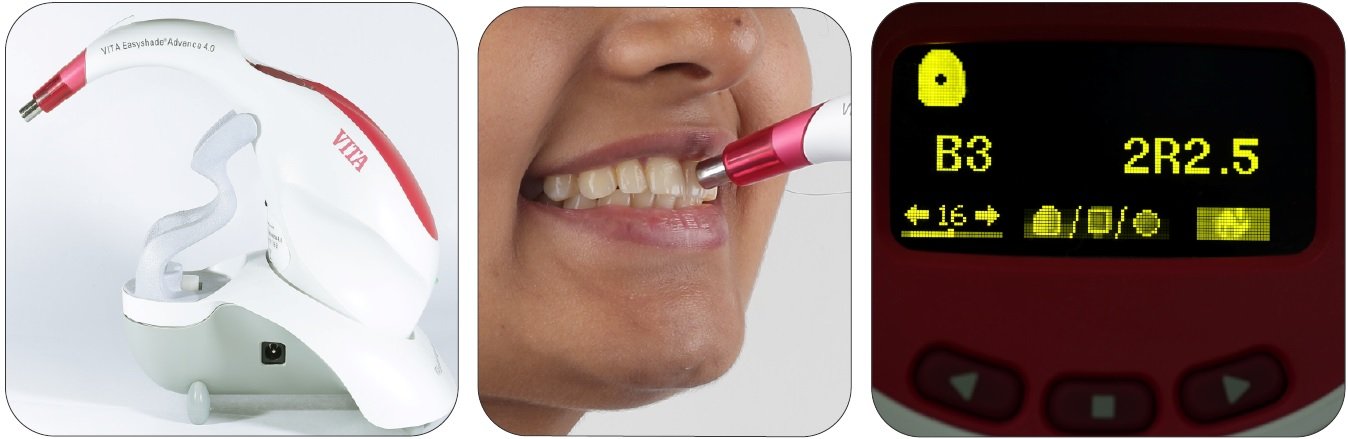
Fig. 3.33-3.35: VITA Easyshade Advanced 4.0. This is an example of an instrument for shade selection and shade communication.
Advantages
- The readings with the instrumental technique are objective in nature.
- They are independent of ambient light conditions.
- The readings are rapidly obtained.
- There is possibility of storing the reading.
- The prosthesis delivered by the laboratory can be assessed to gauge the reproduction of the communicated shade.
Drawbacks
- Cost of the instrument is the primary downside.
- Lack of consensus over their predictability and reproducibility is a slowly fading concern.
Disclaimer from Guident
The views and opinions expressed in articles published in Guident are solely those of the authors and do not necessarily reflect the views of the editors, the editorial board or the publisher, Ivory India. Guident does not endorse any product, technique or treatment described. Clinical content is intended for qualified dental and medical professionals and is not a substitute for individual clinical judgement. Guident, its editors and the publisher accept no liability for any consequence arising from the use of information published in the journal.
How to cite this article
Dr. Moez I. Khakiani, Dr. Mayur Dawda, Dr. Akshay Sharma. Shade Selection and Shade Communication: Part-2. Guident. 2023 Jan;16(2). Available from: https://guident.in/articles/prosthodontics/shade-selection-and-shade-communication-part-2.html


