Principles of Tooth Preparation: Part-7
CANINE PREPARATION FOR A PFM CROWN

Fig. 4.171: Prior to tooth preparation, a putty index is prepared.
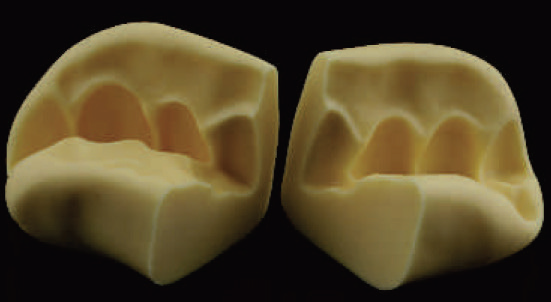
Fig. 4.172: This index is sliced mid-sagitally across the tooth to be prepared..

Fig. 4.173: First, depth grooves are made in the gingival and incisal plane using the MS 1.0 bur, by sinking it to its full depth..

Fig. 4.174: Grooves as seen from the incisal view. Note, how they are placed in two distinct planes.
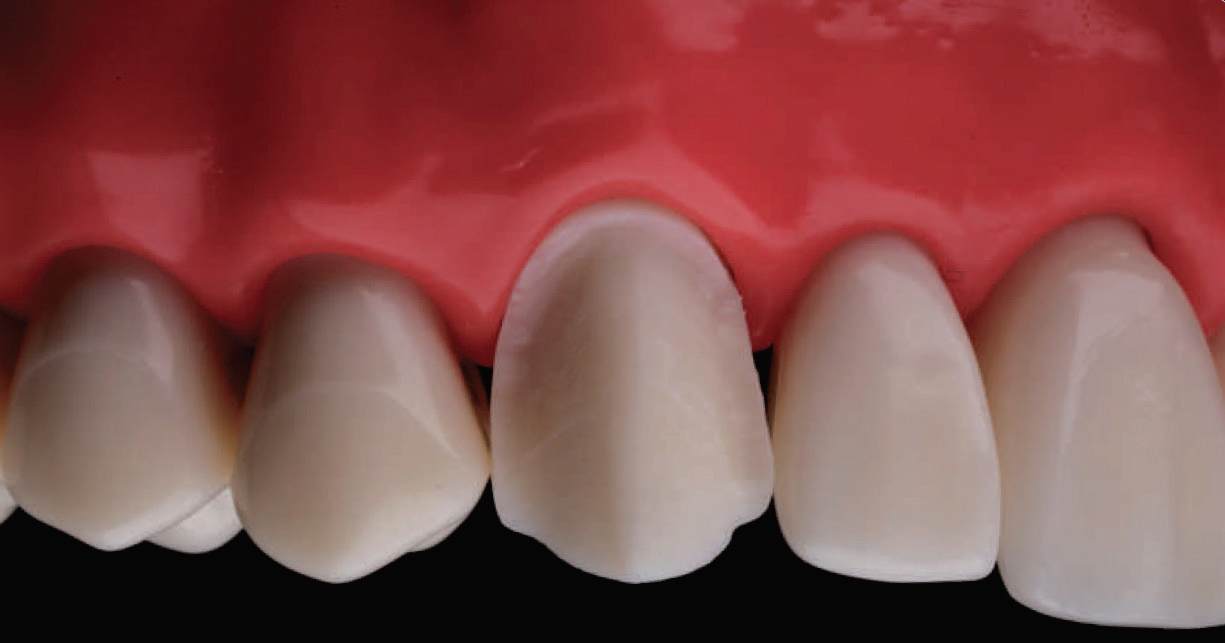
Fig. 4.175: Following this, the labial surface is reduced in two planes using the same bur.

Fig. 4.176: When reducing the labial aspect of the canine, it is important to follow the pre-existing anatomy. Here, the canine ridge is maintained as part of the preparation design.
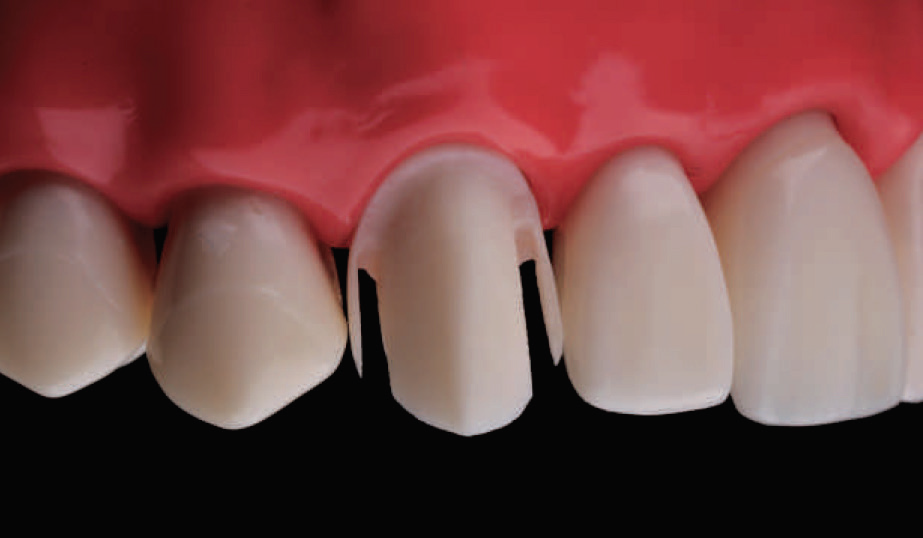
Fig. 4.177: Proximal contacts are then opened with the help of the MI 0.8 bur. Top: Labial view; Center: Palatal view; Bottom: Occlusal view

Fig. 4.178: Proximal contacts are then opened with the help of the MI 0.8 bur. Top: Labial view; Center: Palatal view; Bottom: Occlusal view
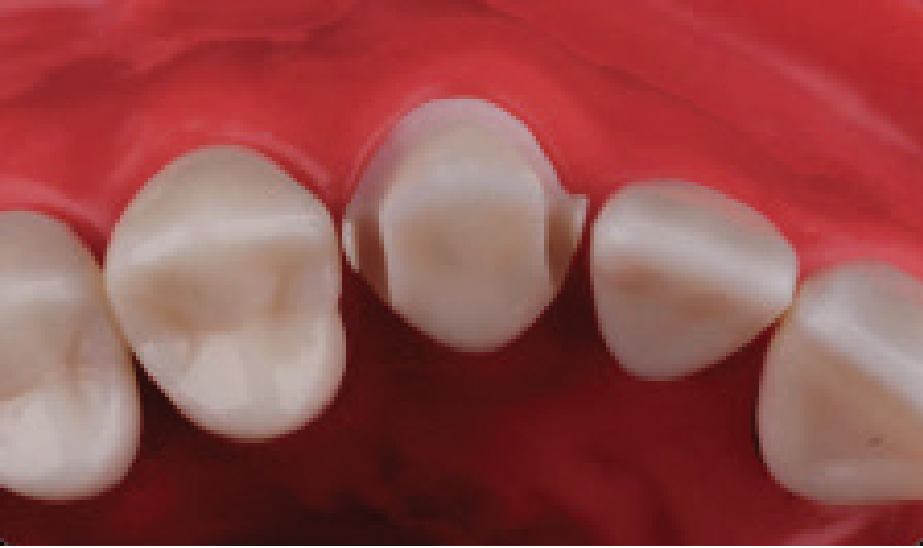
Fig. 4.179: Proximal contacts are then opened with the help of the MI 0.8 bur. Top: Labial view; Center: Palatal view; Bottom: Occlusal view
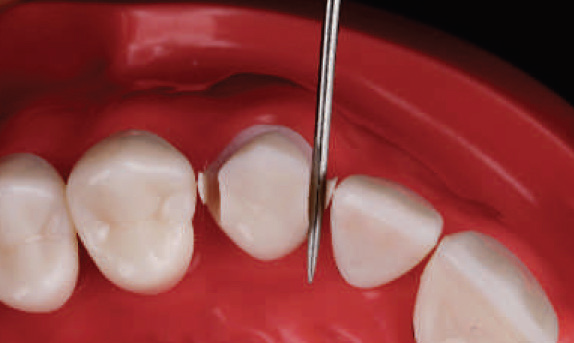
Fig. 4.180: The mesial lip of enamel is then broken with the help of a straight probe.
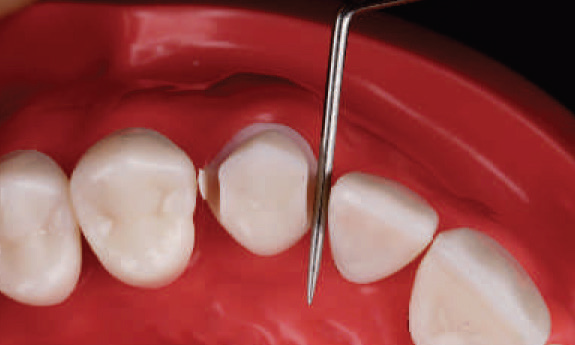
Fig. 4.181: The mesial lip of enamel is then broken with the help of a straight probe.
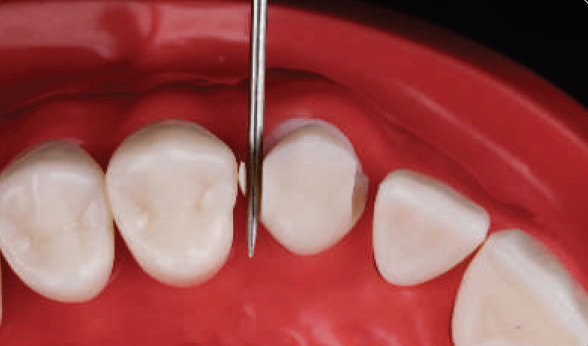
Fig. 4.182: Next, the distal lip of enamel is broken.
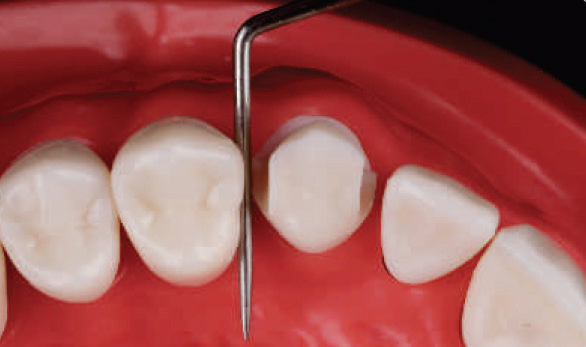
Fig. 4.183: Next, the distal lip of enamel is broken.
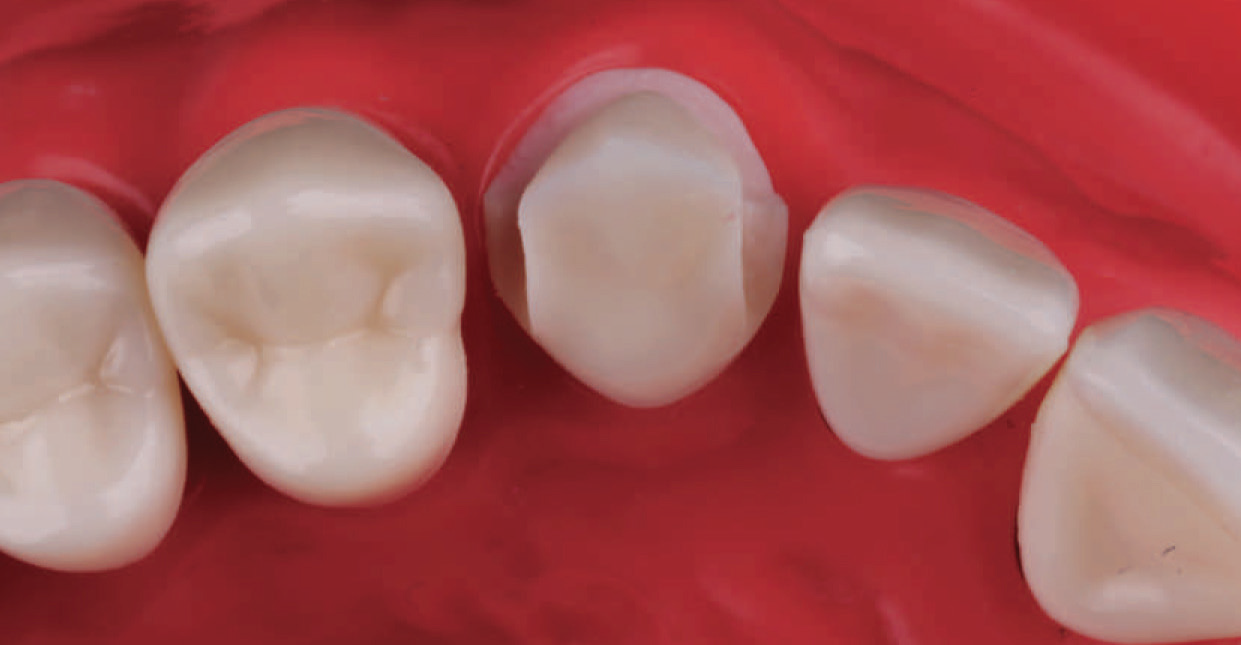
Fig. 4.184: By following this technique, the proximal contacts are opened without inflicting any damage to the adjacent teeth.

Fig. 4.185: The palatal axial wall is then reduced with the DC 1.0 bur, sinking it to half its width only.
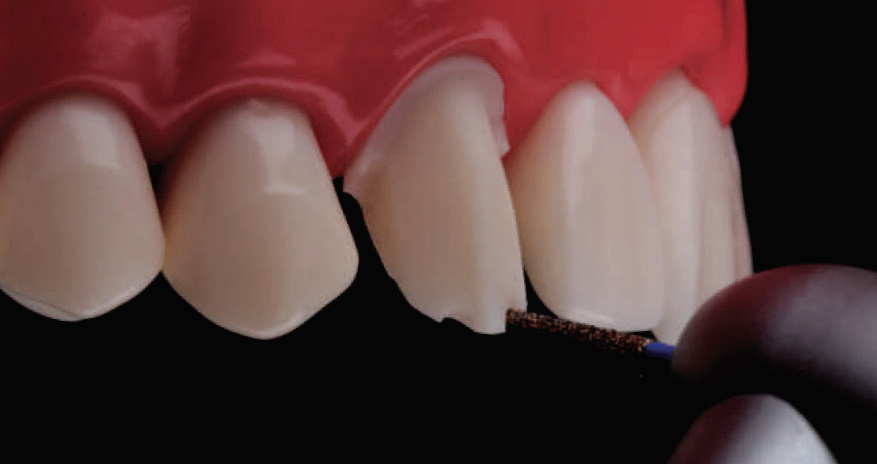
Fig. 4.186: Alternate technique for incisal edge reduction: Tip of the DC 1.0 bur is sunken full depth, thereby leaving a 1 mm groove. This bur is angled palatally to follow the original incisal edge.
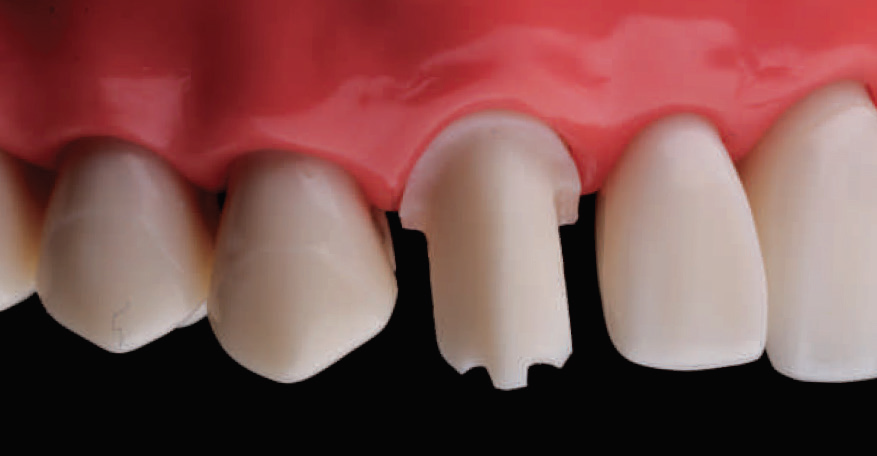
Fig. 4.187: Two 1 mm deep groves are made; one on the mesial and one on the distal incline of the incisal edge.
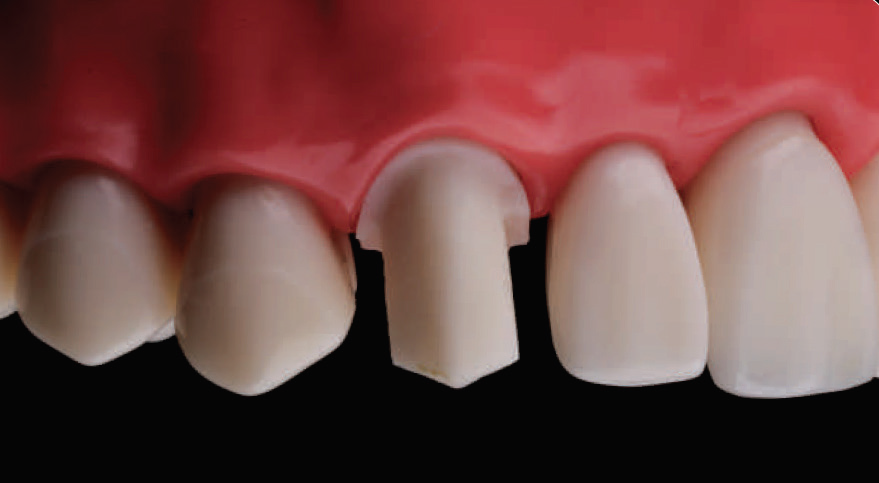
Fig. 4.188: The incisal edge is then reduced following the incisal architecture. This gives a uniform 1 mm reduction of the incisal edge.
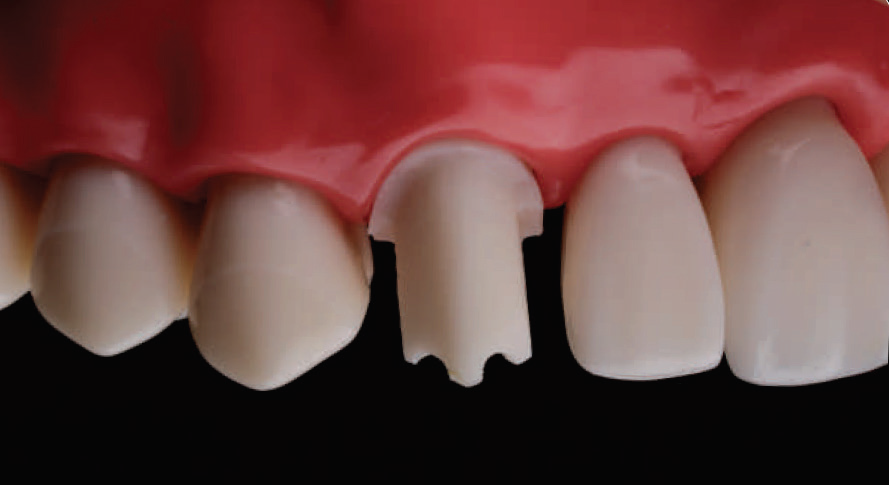
Fig. 4.189: Two additional 1 mm depth grooves are made and reduced using the same protocol.
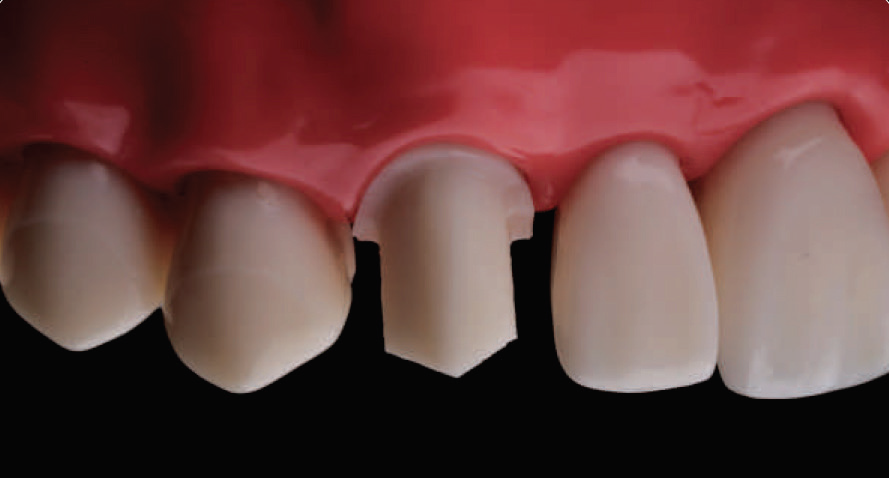
Fig. 4.190: By using this technique, a uniform 2 mm incisal edge reduction can be achieved.
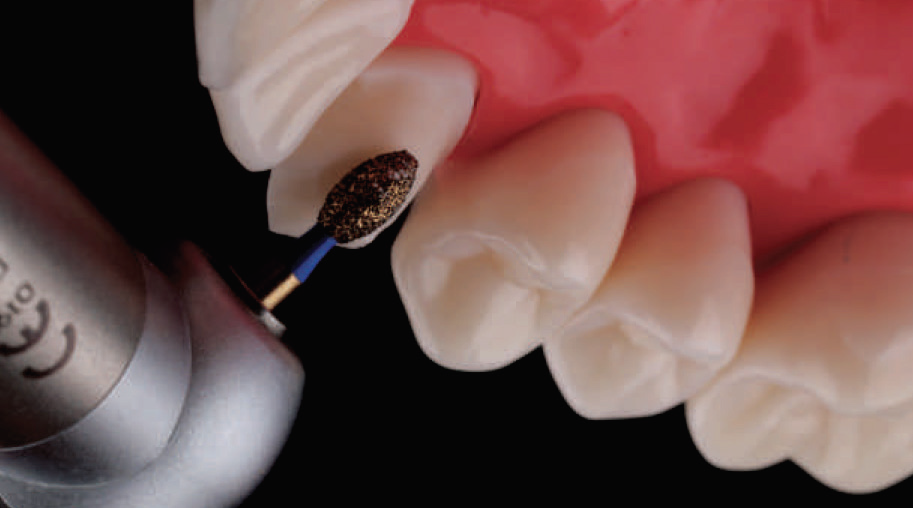
Fig. 4.191: Next, the CR 2.3 bur is used to reduce the palatal fossa. This image shows the correct orientation of the bur.
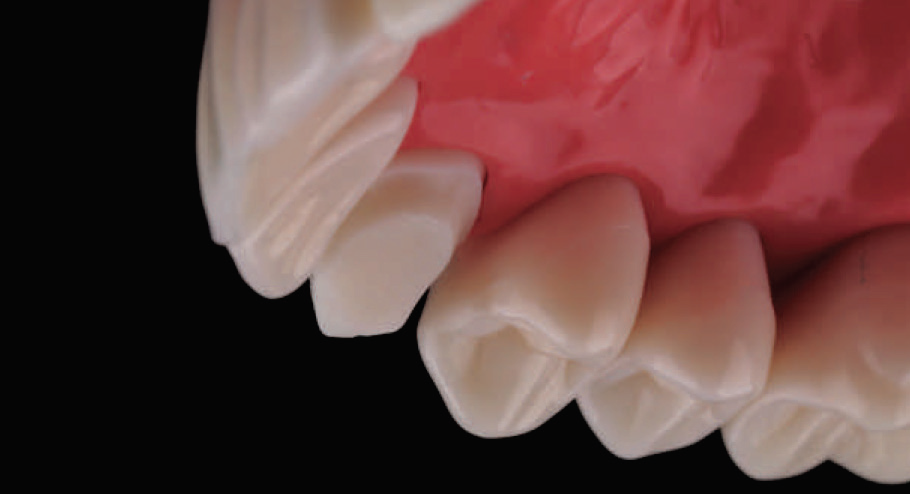
Fig. 4.192: Palatal fossa is reduced while maintaining the concave profile of this surface.
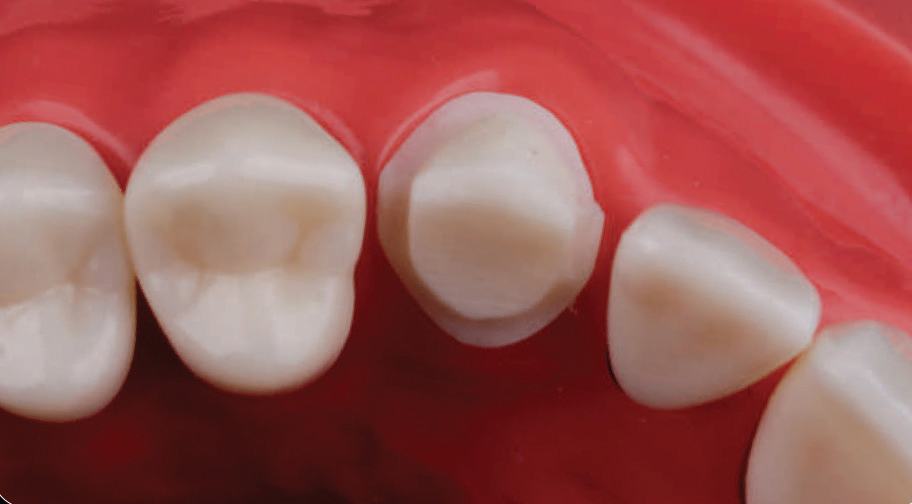
Fig. 4.193: Gross reduction of the tooth is now complete.

Fig. 4.194: As part of the finishing process, the labial and proximal margins are refined using the MS 1.3F bur, while the palatal axial wall is finished using the DC 1.2F bur.

Fig. 4.195: Final preparation: Labial view.

Fig. 4.196: Final preparation: Palatal view.
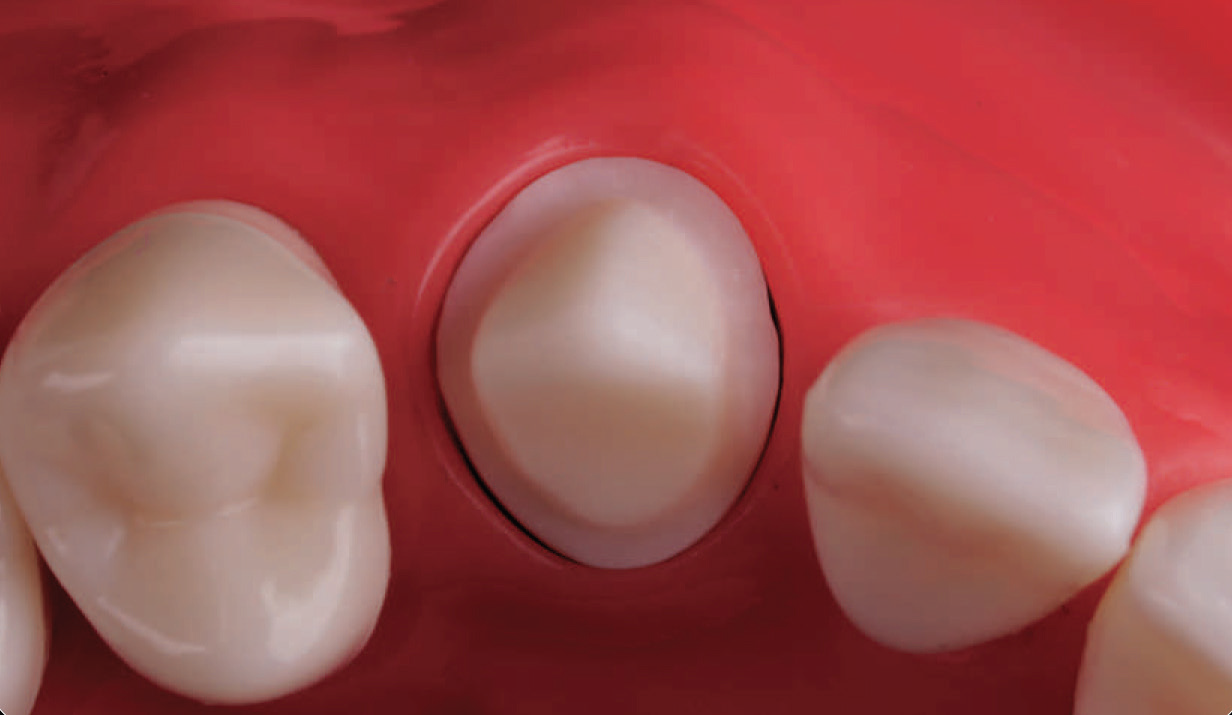
Fig. 4.197: Final preparation: Occlusal view.
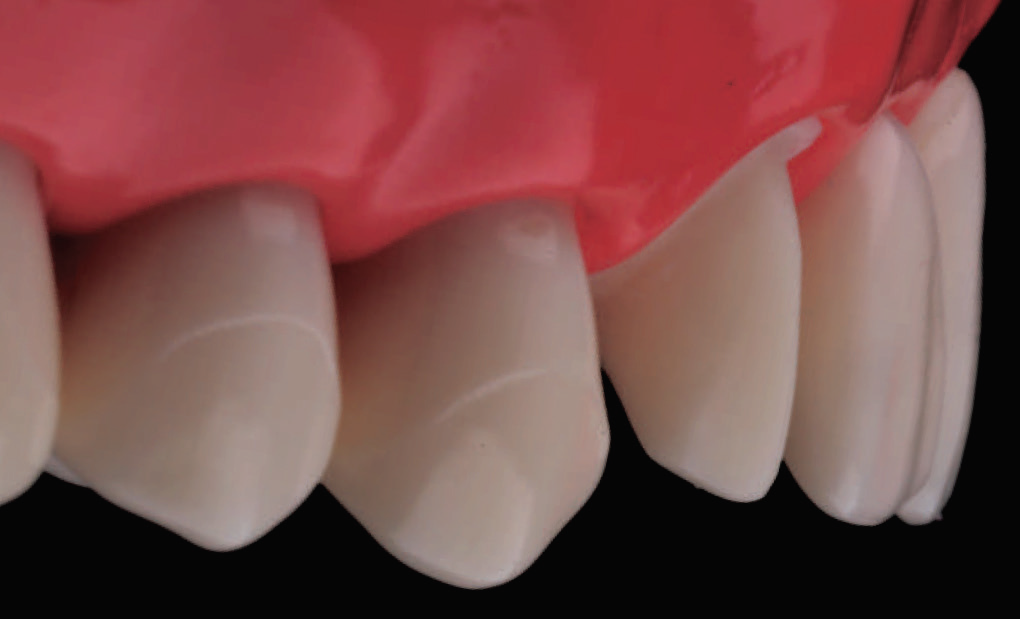
Fig. 4.198: Final preparation: Angular view. Note, the two plane reduction which follows the general outline of the adjacent teeth in the arch.
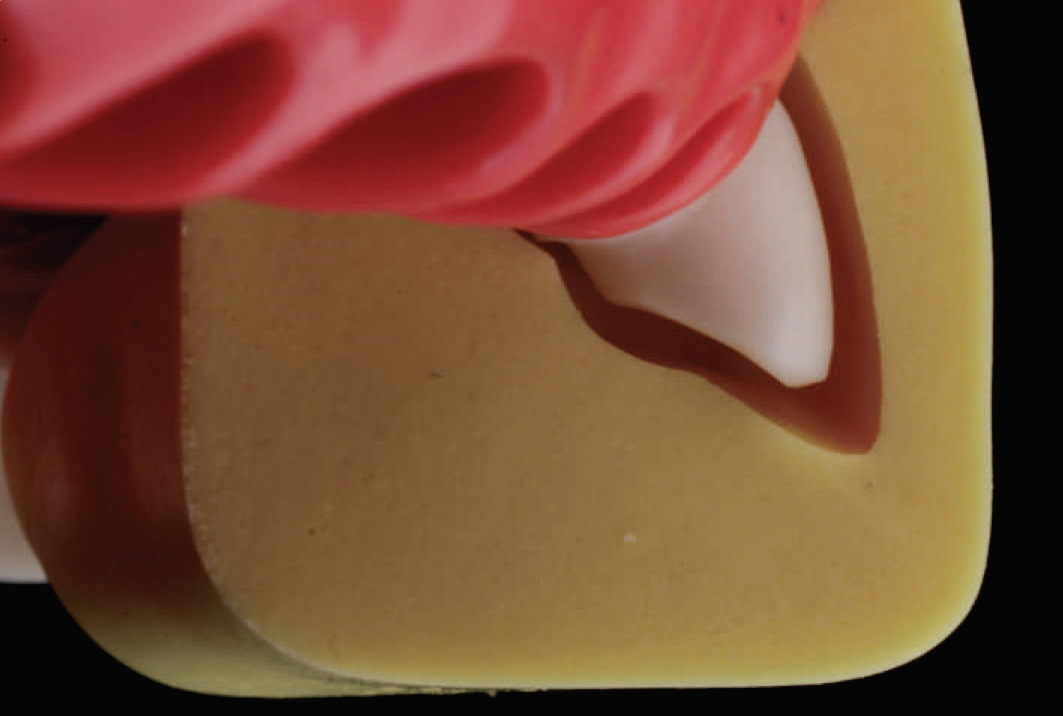
Fig. 4.199: View of the final preparation showing the desired reduction, as gauged with the use of the pre-treatment index.
MOLAR PREPARATION FOR A MONOLITHIC METAL/ZIRCONIA CROWN
Conservation of tooth structure is the primary mandate when preparing any tooth to receive a monolithic prosthesis.

Fig. 4.200: First, depth grooves are made along the gingival plane, using the DC 1.0 bur sinking it to only half its width.

Fig. 4.201: Next, the gingival plane is reduced using the same bur. Here again, the margin is best kept supra-gingival and should follow the gingival architecture. Occlusal plane (plane 2) is not reduced at this time.
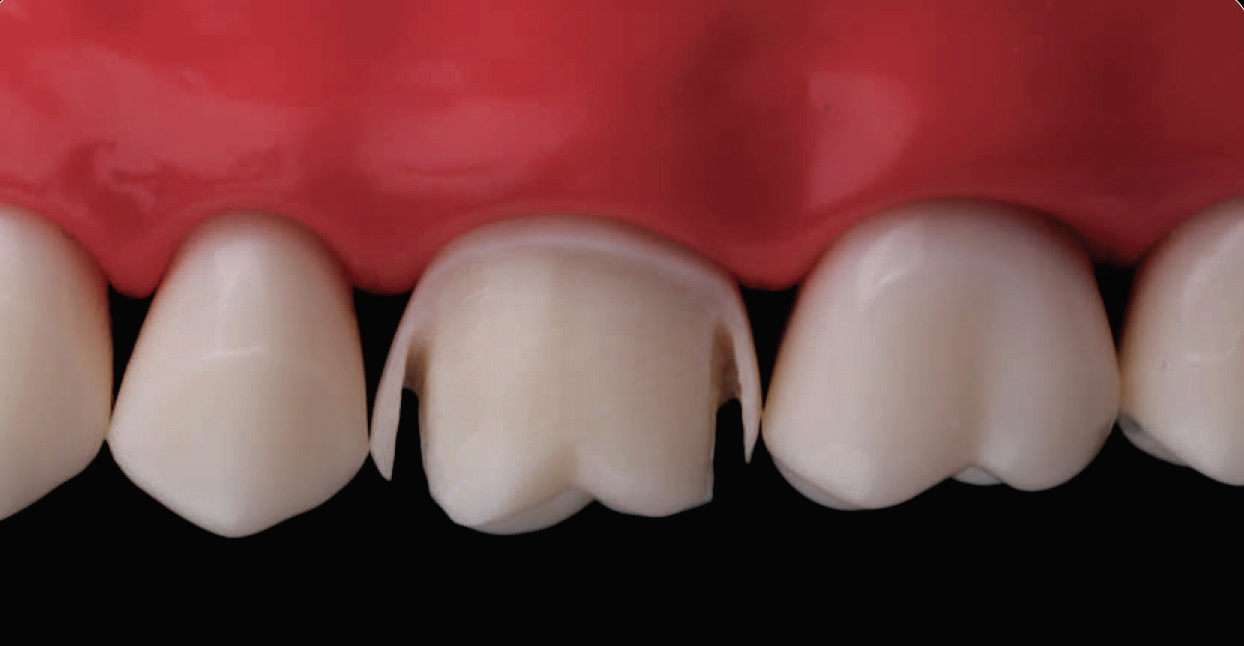
Fig. 4.202: Following this, the MI 0.5 bur is used interdentally, leaving behind a thin sliver of enamel on both sides.

Fig. 4.203: A straight probe is then used to break the contacts open, without traumatizing the adjacent teeth.
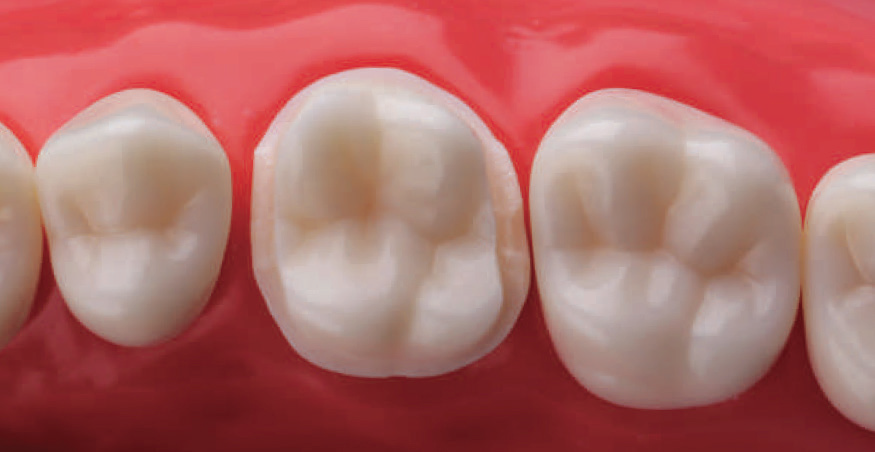
Fig. 4.204: The lingual margin is then prepared using the same bur by sinking it to half its width.
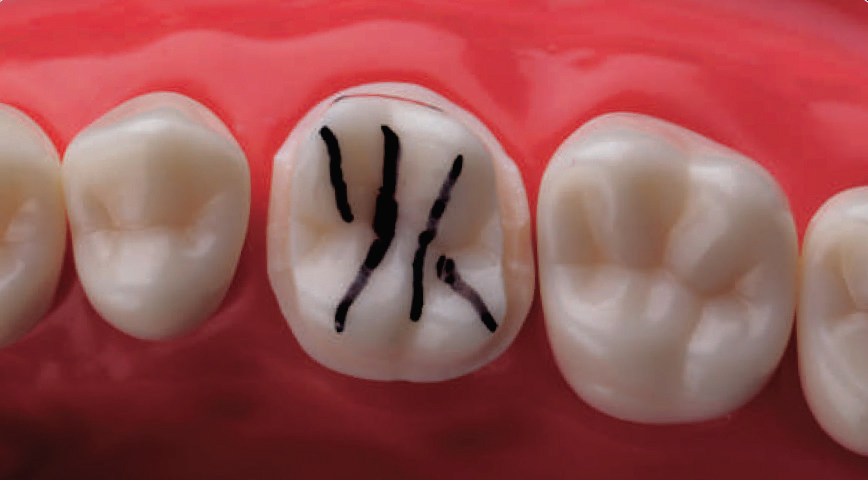
Fig. 4.205: When reducing the occlusal surface of a maxillary molar, it is important to follow the pre-existing anatomy. Making some imaginary lines along cusp ridges and occlusal development grooves is helpful.
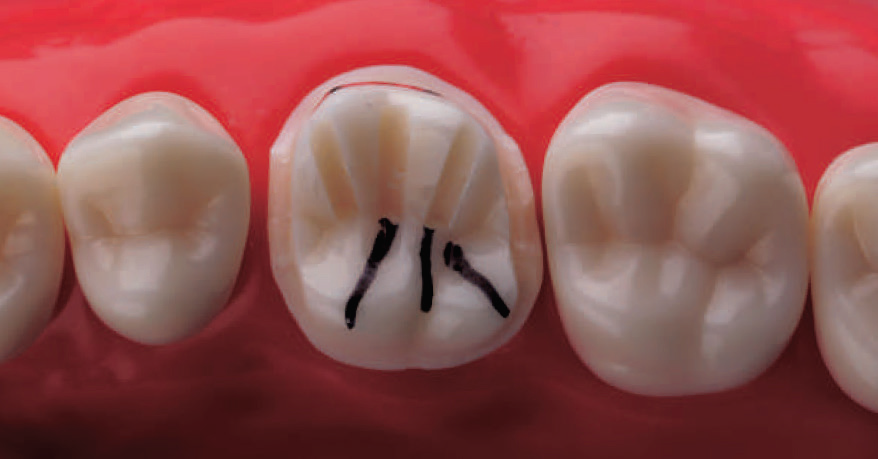
Fig. 4.206: First, depth grooves are made along the imaginary marks on the buccal cusp using the OR 1.2 bur. This bur is sunken slightly short of its full depth (as the desired occlusal reduction here is 1 mm).
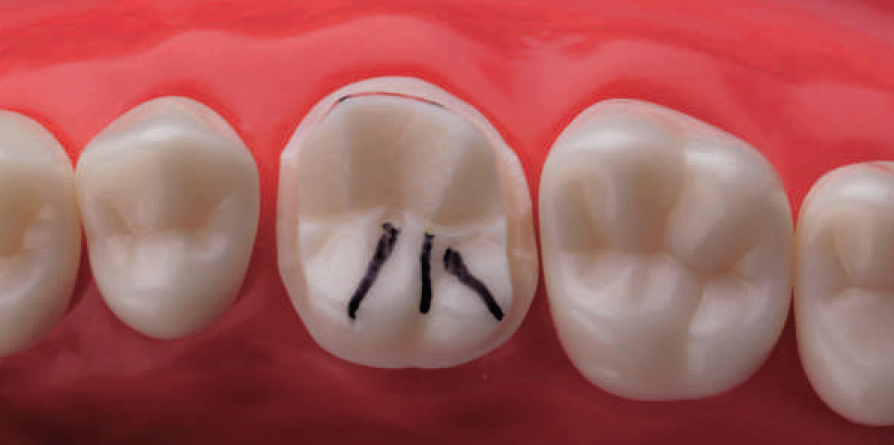
Fig. 4.207: The buccal cusps are then reduced following the pre-existing occlusal anatomy.
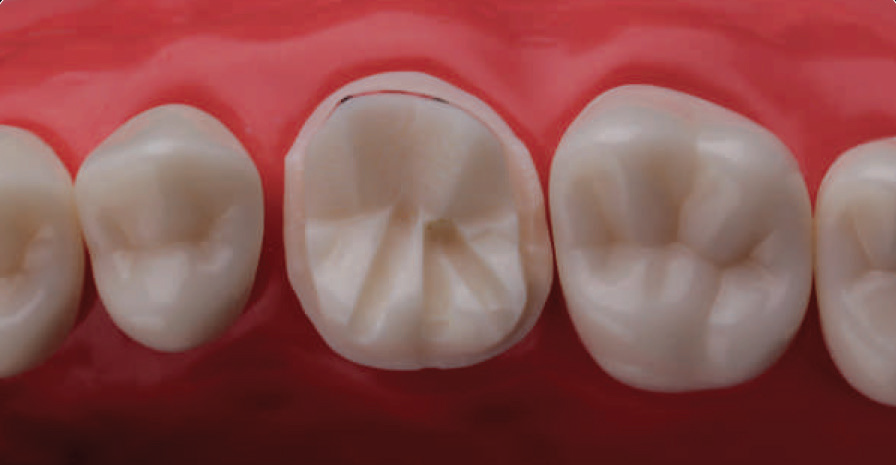
Fig. 4.208: Following this, depth grooves are made along the palatal cusp using the same bur. However, these being the functional cusps, the OR 1.2 bur is sunken to its full depth.
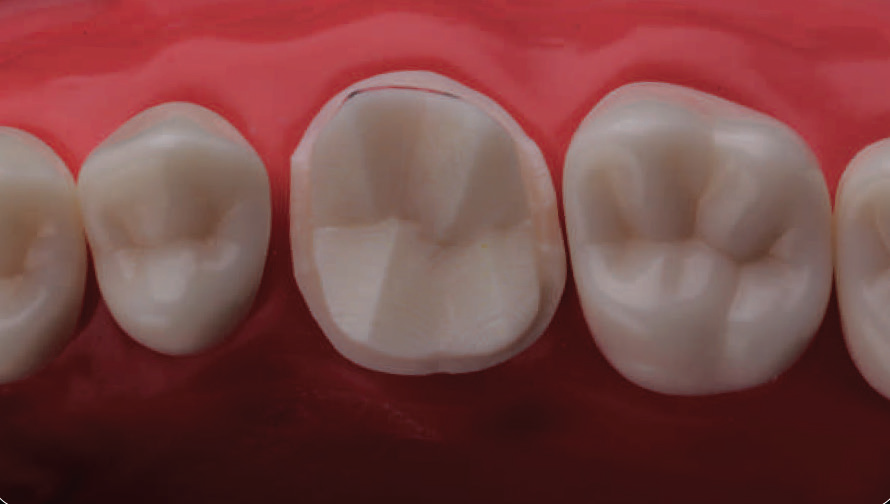
Fig. 4.209: The palatal cusps are then reduced following the pre-existing cuspal anatomy.
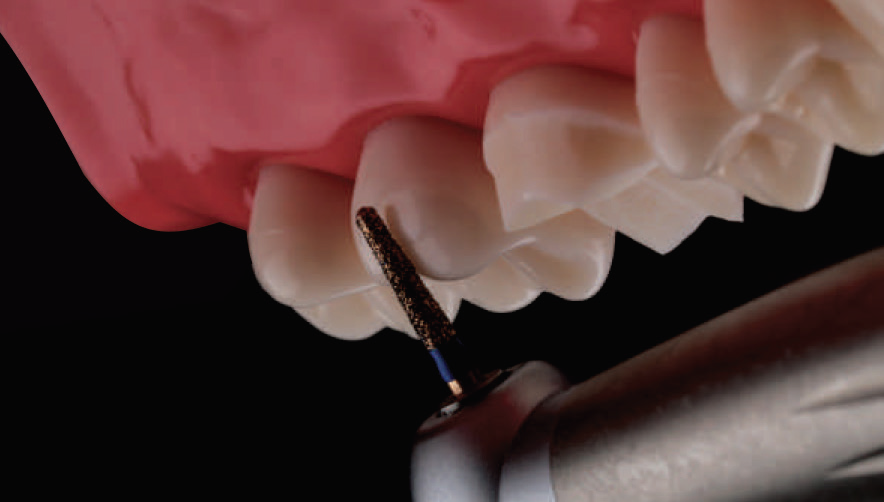
Fig. 4.210: Next, the functional cusp bevel is prepared on the palatal cusp, following the same incline as that present on the adjacent molar. Top: Bur oriented along Plane 2 of adjacent molar; Bottom: Same angle carried to the tooth being prepared.
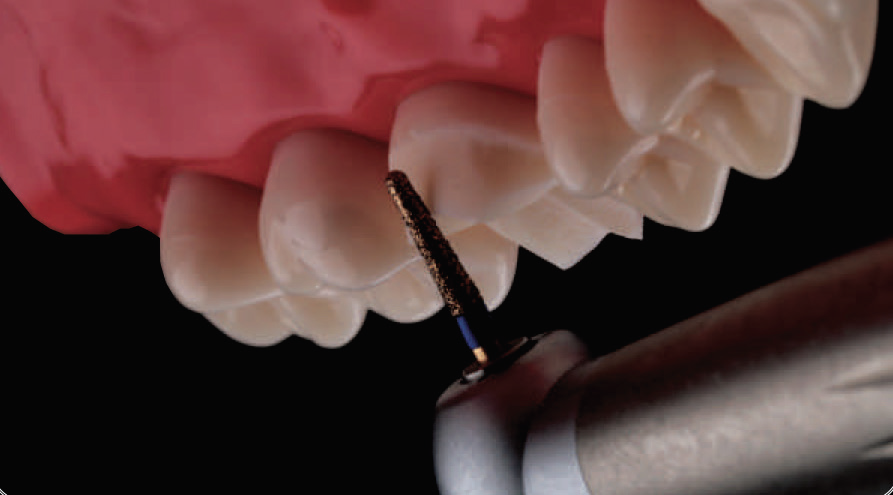
Fig. 4.210: Next, the functional cusp bevel is prepared on the palatal cusp, following the same incline as that present on the adjacent molar. Top: Bur oriented along Plane 2 of adjacent molar; Bottom: Same angle carried to the tooth being prepared.
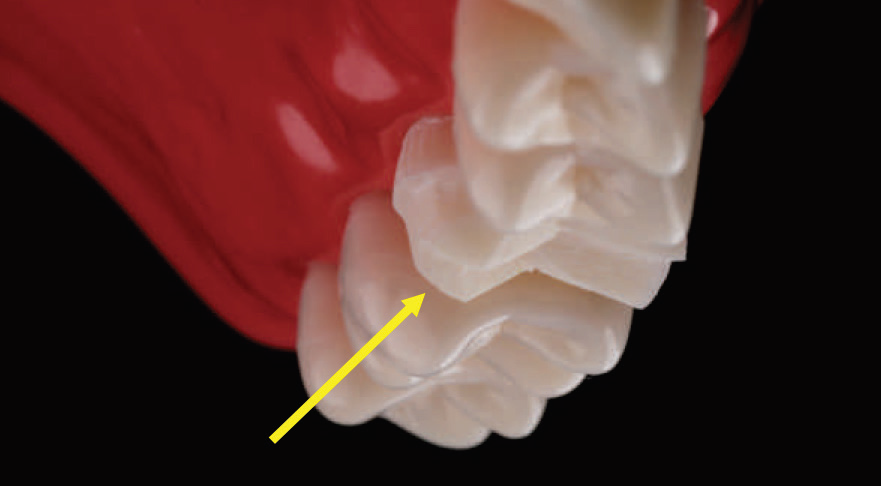
Fig. 4.212: Note, how the functional cusp bevel has the same angular presentation as the remaining posterior teeth in the quadrant.
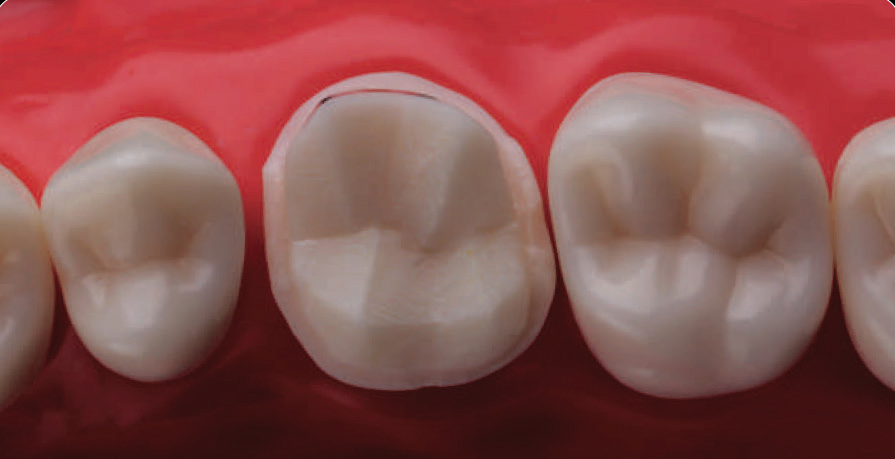
Fig. 4.213: The gross preparation is now complete.
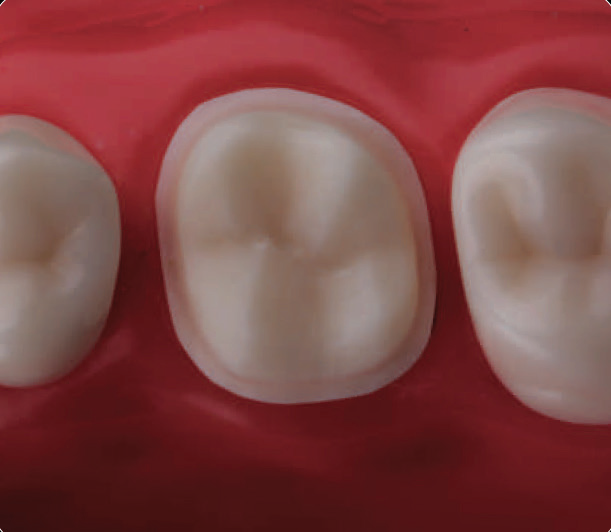
Fig. 4.214: The preparation is then finished using the DC 1.2F bur to remove all sharp edges, ensuring a smooth uniform margin and an undercut free preparation.
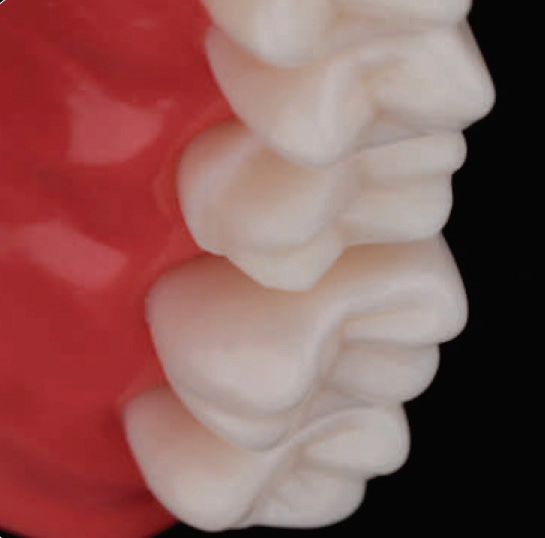
Fig. 4.215: The preparation is then finished using the DC 1.2F bur to remove all sharp edges, ensuring a smooth uniform margin and an undercut free preparation.
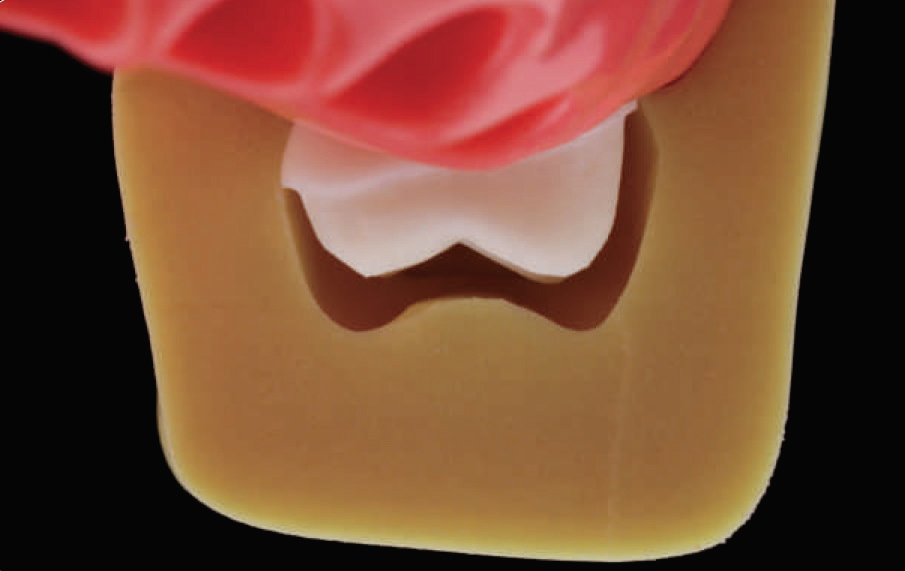
Fig. 4.216: Overall preparation dimensions, as gauged with the help of a pre-treatment index.
Disclaimer from Guident
The views and opinions expressed in articles published in Guident are solely those of the authors and do not necessarily reflect the views of the editors, the editorial board or the publisher, Ivory India. Guident does not endorse any product, technique or treatment described. Clinical content is intended for qualified dental and medical professionals and is not a substitute for individual clinical judgement. Guident, its editors and the publisher accept no liability for any consequence arising from the use of information published in the journal.
How to cite this article
Dr. Moez I. Khakiani. Principles of Tooth Preparation: Part-7. Guident. 2019 Jun;12(7). Available from: https://guident.in/articles/prosthodontics/principles-of-tooth-preparation-part-7.html